

Experiencing a flat tire during a bike ride is common, but it doesn’t have to derail your journey. Knowing how to replace a bike tire is an essential skill for any cyclist.
In this guide, we’ll walk you through the process, step-by-step, to help you get back on the road swiftly and safely.
Tools You’ll Need

Before starting, you will need the following tools:
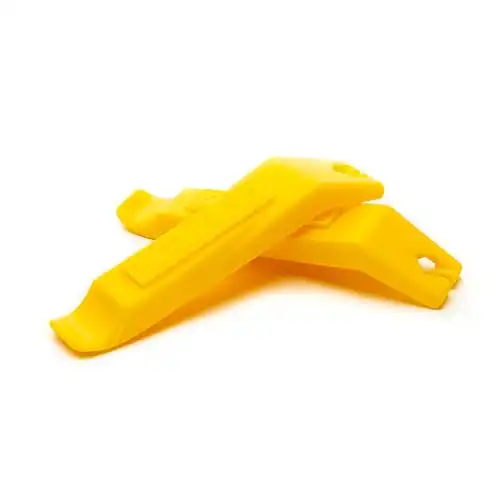
- Tire levers
- New tire (correct size)
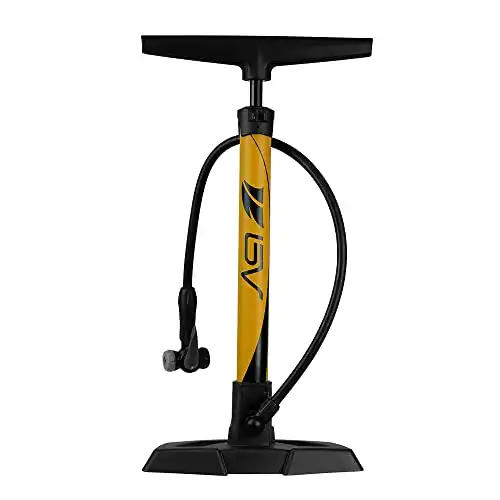
- Bicycle pump
- New inner tube
- Optional: YouTube tutorials for visual guidance
Our pick of the best bike repair kits to buy before hitting the road for your next ride

How Do You Fix a Bike Tire Step by Step?
Step 1: Prepare Your Workspace
Find a flat, stable surface to work on. If possible, turn your bike upside down or use a bike stand to elevate it.
If you happen to have hydraulic brakes be cautious as there is the possibility of air enter into the brake line, which cause the brakes to feel spongy. Next, shift the gears to the smallest ring as this will make it easier to remove the wheel.
Step 2: Remove the Wheel
If you bike has rim brakes you will want to release the brakes first before changing the front or rear tire. For bikes with a quick-release lever, open it to loosen the wheel.
For bikes with a thru axel, use the appropriate allen key often included with the bike (typically a 6mm hex) to unscrew them. Gently pull the wheel out of the bike frame.
Step 3: Deflate and Detach the Tire
Remove the air valve cap to access release valve of the inner tube. If the tube has a Presta valve then unscrew the tip on the end of the value and then press down to deflate the tire.
If the tube has Schrader valve then use a fine pointed object to press the valve core down to deflate the tire fully. Then with the help of tire levers remove the tire from the wheel.
You will want to insert them between the tire and the rim. Work around the wheel, sliding the levers to detach the tire from the rim.
Use a second lever if necessary as this will give you more leverage and make the process easier. We recommend Pedro’s tire levers as they are the #1 choice used universally by cyclists.
Step 4: Inspect the Tire and Rim
Once the tire is off, remove the inner tube. Next, inspect the tire and the inner rim for sharp objects or debris that might have caused the puncture.
Remove any foreign objects and clean the rim’s inner edge. On occasion you might experience what is known as a pinch flat, which is caused by the wheel rim puncturing your tire on either side due to excessive force.
Step 5: Install the New Inner Tube
Starting at the valve hole, insert the new inner tube into the tire. Carefully tuck the tube inside the tire, ensuring it sits evenly without any twists or folds.
A trick to make this process easier is to inflate the inner tube with just a little air. This will help give the tire some shape so that it isn’t as likely to twist or fold.
Step 6: Mount the Tire Back onto the Rim
Beginning at the valve, fit one side of the tire onto the rim. Use your hands to work the tire onto the rim. Be cautious not to pinch the inner tube between the tire and the rim.
As you make your way to the other side of the wheel you can use your tire levers to help finish the job.
Step 7: Inflate the Tire
Partially inflate the tube to give it some shape, then tuck it into the tire. Check that the tube isn’t sticking out anywhere. Use the pump to fully inflate the tire to the recommended pressure.
Step 8: Reattach the Wheel
Carefully put the wheel back into the bike frame. Make sure the chain sits on the smallest ring and that the wheel is aligned correctly.
Tighten the thru axel or close the quick-release lever securely. Be careful not to over tighten the thru axel as this can cause rubbing if you have disc brakes.
If you have rim brakes be sure to close the release on the brake.
Step 9: Check and Test
Inspect the tire for any irregularities or bulges. Spin the wheel to ensure it rotates freely without any rubbing against the brakes or frame. Test the brakes to ensure they function correctly.
What Household Items Can I Use to Fix a Flat Bike Tire?

Fixing a flat bike tire using household items can be a temporary solution until a proper repair or replacement can be made. While it’s recommended to use specialized tools and repair kits, here are some household items that might help in an emergency:
Household Items for Fixing a Flat Bike Tire
What You’ll Need:
- Spoon or Butter Knife: Instead of a tire lever, a sturdy spoon or butter knife can help pry the tire away from the rim.
- Pliers: Used for removing a lock ring or manipulating wires if needed.
- Dish Soap or Water with Soap: As a lubricant to help slide the tire off the rim and to check for leaks when re-inflating.
- Duct Tape or Electrical Tape: Temporary patches for small punctures or to secure a damaged tire temporarily.
- Pump or Compressor: For inflating the tire after the repair.
Steps:
- Leverage with Spoon or Butter Knife: Use the edge of a spoon or a butter knife to carefully pry the tire away from the rim. This might require more effort than using a dedicated tire lever.
- Pliers for Adjustments: If there’s a lock ring that needs adjusting or any wire manipulation (like brake cables), pliers might help in making necessary adjustments.
- Lubrication with Soap/Water: Apply a mixture of dish soap and water to the tire bead or rim to ease the tire’s removal or to detect leaks by looking for bubbles when the tube is inflated.
- Temporary Patch with Tape: For minor punctures or cuts, placing a small piece of duct tape or electrical tape on the inner side of the tire might help temporarily cover the hole and prevent immediate air leakage.
- Use a Pump or Compressor: Inflate the repaired tire using a pump or compressor to the recommended pressure. Check for any further leaks or issues.
While these household items can serve as temporary solutions, they might not provide a permanent fix. Visiting a bike shop or using proper bike repair tools as recommended in a bicycle manual is advisable for a more reliable and long-term repair of bike tires, bicycle wheels, lock rings, brake cables, outer gears, and other bike components.
Can I Fix-a-Flat tire myself?

“Fix-a-Flat” products are typically aerosol cans containing sealant intended to quickly seal small punctures in tires, providing a temporary solution to reinflate and potentially repair a flat tire. While these products can be useful in emergencies, there are considerations when using them:
Can I Use Fix-a-Flat to Repair a Bicycle Wheel?

|

|
Application on Bicycle Tires:
- Effectiveness: Fix-a-Flat can work on bike tires, sealing small punctures in the inner tube.
- Compatibility: It can be used with various wheel rims and outer gear systems commonly found on bicycles.
- Valve Cover: The valve cover might need to be removed to inject the sealant into the tube through the valve.
Considerations:
- Temporary Solution: It’s a temporary fix and might not permanently solve the issue. It’s recommended to replace or patch the tube as soon as possible.
- Potential Mess: Fix-a-Flat can create a mess inside the tire, and cleaning it thoroughly before permanent repair is crucial.
- Compatibility Issues: Some valve covers might not work well with Fix-a-Flat, so removing them might be necessary.
- Pressure and Ride Quality: The sealant might affect tire pressure and ride quality, so it’s important to check and adjust tire pressure as needed.
Steps to Use Fix-a-Flat:
- Prepare the Tire: Remove the valve cover, attach the Fix-a-Flat nozzle, and inject the sealant into the tube through the valve.
- Reinflate: After injecting the sealant, reinflate the tire to the recommended pressure.
- Rotate the Wheel: Spin the wheel to distribute the sealant evenly inside the tire, allowing it to seal any punctures.
Using Fix-a-Flat on a bicycle wheel can be a quick solution for minor punctures, allowing you to reinflate the tire and potentially continue riding. However, it’s essential to replace or patch the tube as soon as possible and thoroughly clean the tire and rim to avoid long-term issues.
For optimal and reliable repairs, especially for the safety of your ride, consider using proper repair techniques, such as replacing the tube or patching it according to the manufacturer’s guidelines outlined in a bicycle manual.
How Do You Fix a Flat Bike Tire Without a Patch?

Fixing a flat bike tire without a patch is necessary if the puncture is severe and the damage is too extensive to patch.
Here’s a guide on how to do it:
Fixing a Flat Bike Tire Without a Patch
What You’ll Need
- Tire levers
- Bicycle tire
- Bike pump
- Bike tube

Steps:
- Locate the Puncture: Identify the punctured area by spinning the wheel slowly and listening for the escaping air or feeling around the tire for sharp objects embedded in it.
- Remove the Wheel: For rear wheel repairs, shift gears to the smallest cog. Use the appropriate tools to detach the wheel from the bike frame.
- Deflate the Tire: Remove the valve cap and press the valve to release all the air from the tube.
- Inspect and Remove the Tube: Use the tire lever to gently pry the tire away from the rim. Once one side is loose, carefully remove the tube from the tire.
- Check the Tube: Inflate the tube slightly to identify the puncture. Listen for the hissing sound or feel for air escaping. Submerge the tube in water to locate bubbles if the hole isn’t obvious.
- Prepare the Replacement Tube: If you have a spare tube, ensure it’s the correct size and has the appropriate valve (Presta or Schrader) for your wheel.
- Install the New Tube: Insert the new tube into the tire, starting at the valve hole. Carefully tuck the tube inside the tire, ensuring it’s evenly placed without any twists.
- Remount the Tire onto the Rim: Begin at the valve and work your way around, pushing the tire onto the rim using your hands. Ensure the tube isn’t pinched between the tire and the rim.
- Inflate the Tire: Partially inflate the tube to give it some shape, then tuck it into the tire. Use a pump to inflate the tire to the recommended pressure.
- Check and Reattach the Wheel: Inspect the tire for any irregularities or bulges. Make sure the wheel is aligned properly, and the chain is on the smallest cog for rear wheels. Reattach the wheel securely to the bike frame.
- Test the Tire: Spin the wheel to ensure it rotates freely without any rubbing against the brakes or frame. Test the brakes to ensure they function correctly.
Fixing a flat bike tire with a patch is a temporary solution. It’s advisable to replace the tube at the earliest convenience to avoid further issues during future rides.
Remember, carrying a spare tube and necessary tools while riding is a good practice to handle unforeseen punctures effectively.
Always prioritize safety and ensure your bike is in good condition before heading out for a ride.
Conclusion

Learning how to change a bike tire is a fundamental skill every cyclist should have. With the right tools and know-how, fixing a flat tire becomes a manageable task.
Remember, practice makes perfect, so don’t be discouraged if it takes a few attempts to master the process. For more detailed visual guidance, consider checking bicycle manuals or online tutorials.
And always carry a spare tube and necessary tools when riding, so you’re prepared for unexpected punctures on the road. Happy riding!
Also Read: 12 Must-Have Bike Accessories for Serious Cyclists


